Electric go-karts are awesome self-contained projects, customizable to your liking. I’ve built a few in the past; simple reverse trikes powered by scooter hub motors, but always yearned for something closer to a full-sized electric vehicle. For that reason, I set out to build an extremely capable four-wheeled kart. This is the first of a build series which details the project.
I wanted a kart with all-wheel-drive to showcase complex EV concepts in a down-to-earth way. I really don’t like explainer-type articles without any hands-on tinkering, especially when it comes to EVs. Most EV explainers don’t go deep enough.
Sometimes, I can even remember what all of this stuff does.
To get even closer to a real car I wanted my kart riding on independent suspension. This sounds like a complicated thing to design, but really isn’t. At least, that’s what I thought.
I thought wrong. As soon as I got a few feet down the driveway the front control arms bent out of shape irreversibly. As I sat in my garage pondering this pile of scrap metal I created, I realized there’s a good reason why almost all go-karts don’t have suspension. There’s a great part in Plato’s Republic about this phenomenon. Huge kart guy.
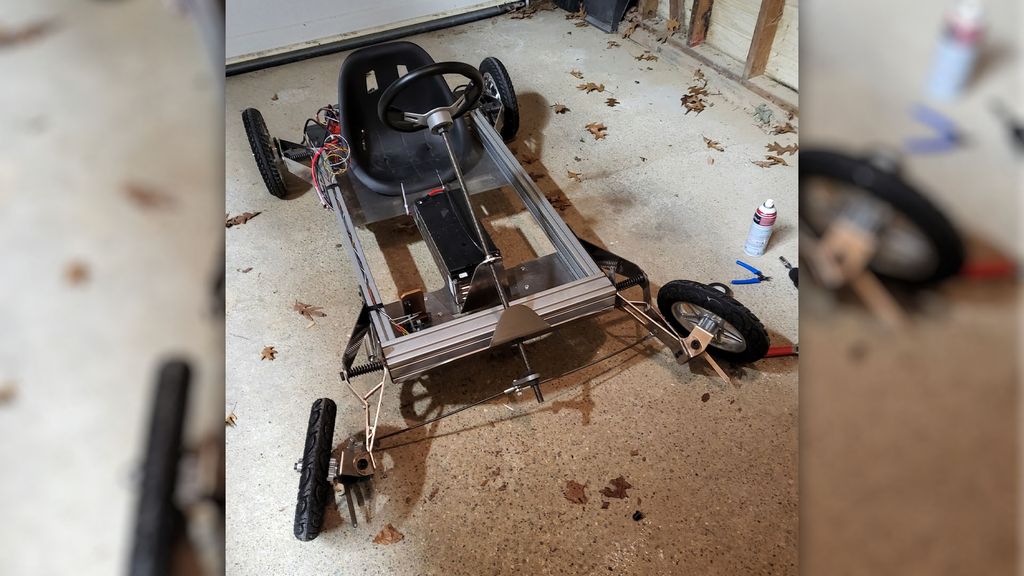
As far as failures go this one was pretty sad to look at.
My control arms are made from steel which was laser-cut and bent by Oshcut, sponsors of this project as well as the Motocompacto Type R. Their service is pretty amazing. Without them, I wouldn’t be able to fail at tasks like this without Motor1’s bean counters looking over my shoulder.
I designed and built a leading and trailing arm system, basically a Citroen 2CV’s suspension, by bolting together two sheet metal parts to form a control arm, instead of the huge horn-shaped metal proboscis used by the French.
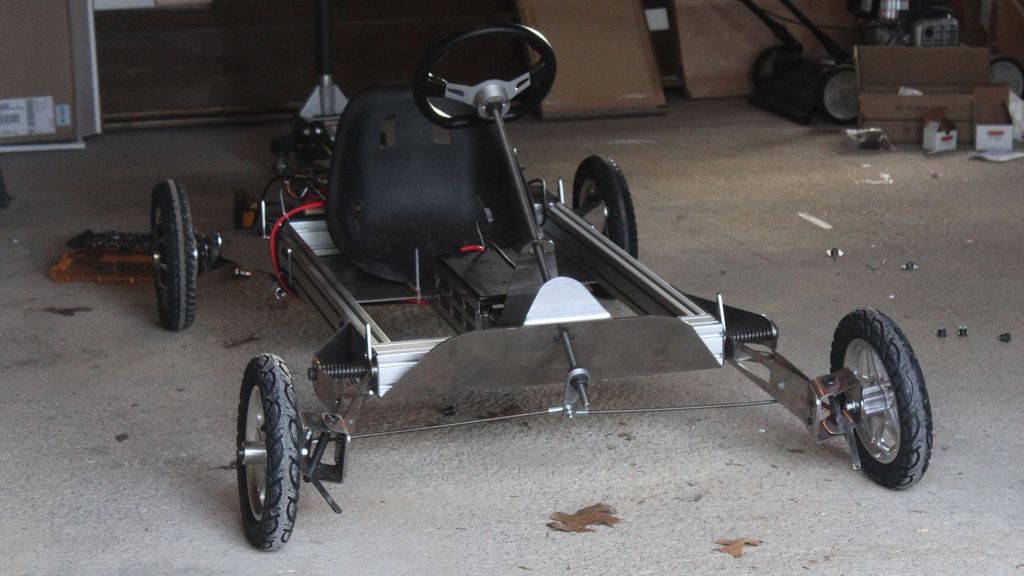
It all looked very promising right up until I tried to drive it.
As I started designing, I began to realize why the 2CV’s suspension works and why mine may not. The Citroen’s control arms are shaped like proboscis because the wheels need clearance to turn. That turning part makes it hard to design a control arm strong enough without welding pieces of the arm together. The more basic trailing arms I had at the back actually worked fine. The fronts are what caused me all my issues. They needed a cutout to allow for a reasonable steering radius.
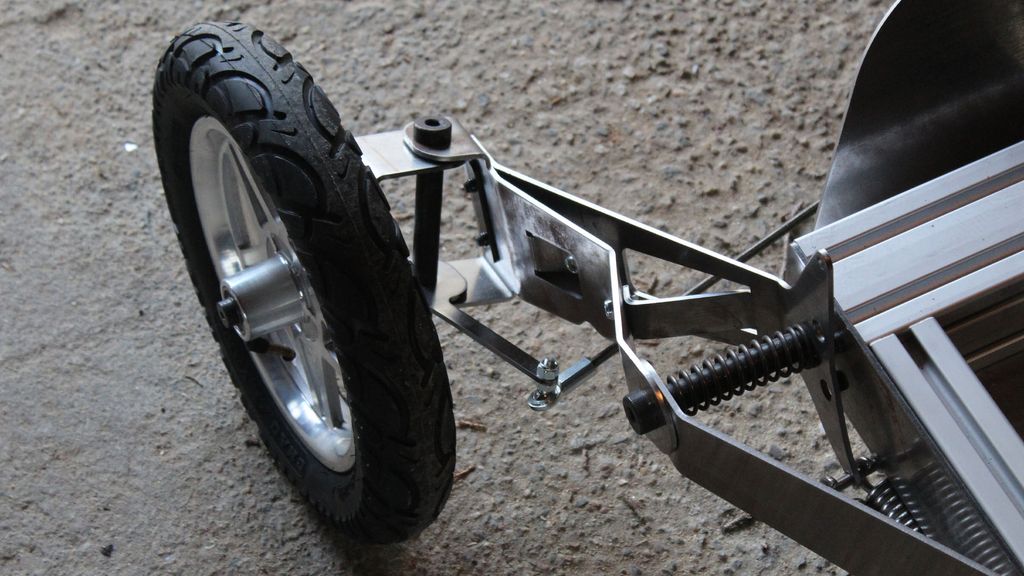
The front control arms looked nice and came together well, but they just weren’t up to the task.
From a broader perspective, though, the key problem with putting suspension on a go-kart is that you get to this funny void wherein having suspension would be really cool because it makes your project a lot more like a car, but there’s almost no way of getting around the associated cost and complexity.
If you look at the suspension of something like an Ariel Atom, it’s just a bunch of tubes welded together with a few ball joints hanging off of them. That is go-kart suspension. That is also an actual car. The suspension on cars like the Lotus Elise looks similar. So you end up having to make actual car suspension for your go-kart. How do you solve that problem? You don’t really. Or, at least I didn’t.
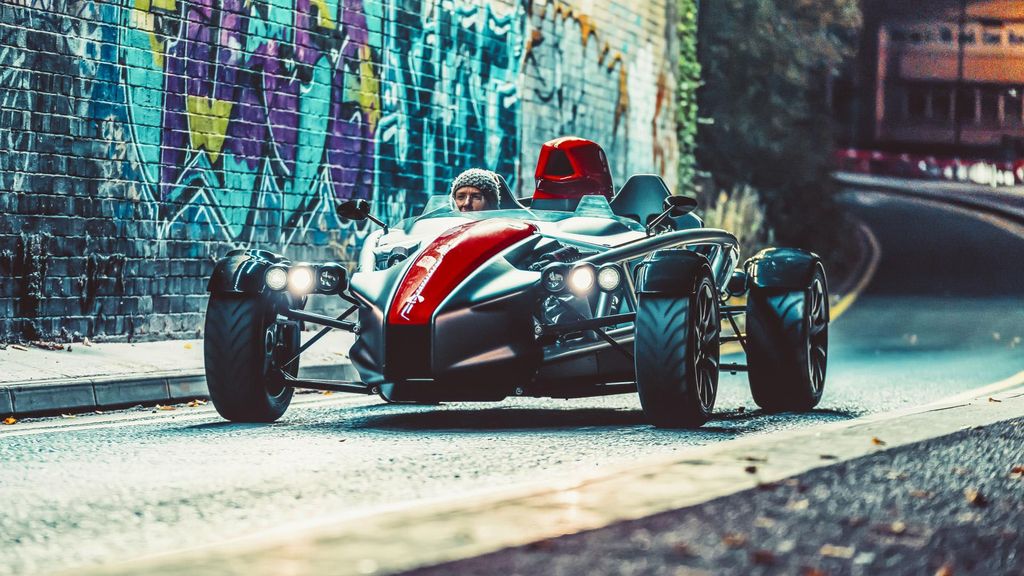
See the suspension on the Ariel Atom? It’s just a bunch of welded tubes. That’s the same thing you see on a lot of off-road karts.
My suspension also didn’t work at all the first time because my springs were too soft. To solve this issue I doubled them up. Installing them in both instances meant hooking one end of the spring up to the control arm and then pulling as hard as I could on the center of it until the other end lined up with a corresponding hole on the chassis. I’ve had the privilege of visiting several factories where cars are built and I’ve admittedly never seen anyone doing this.
After I doubled up the springs and the kart could actually support my weight, I took it out on the first run and the front control arms failed, as you saw before.
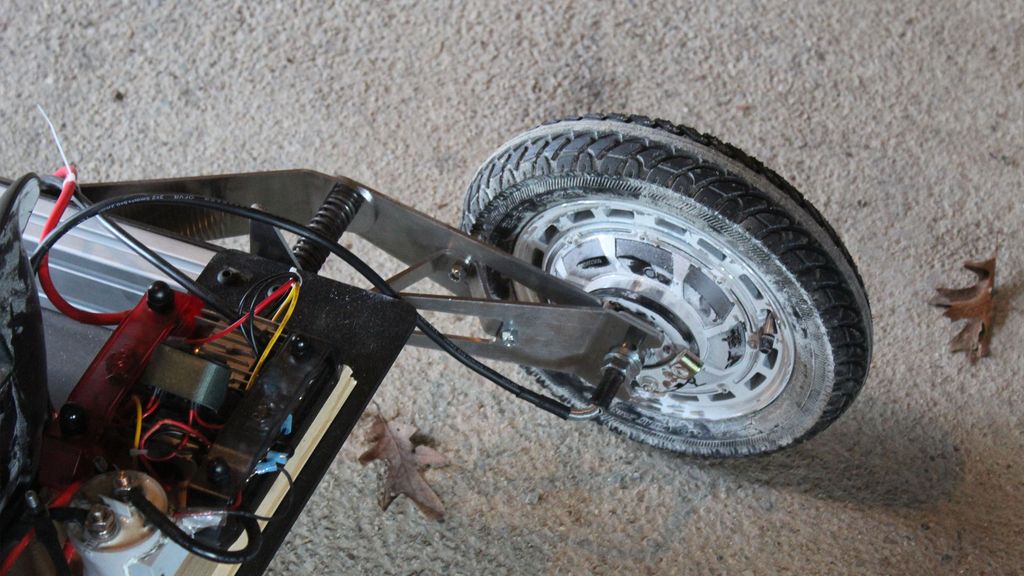
The rear arms held up well, but the front arms were not nearly stiff enough
None of this felt encouraging, but I kept trying to solve the suspension problem anyway, mostly because Oshcut’s fabrication tools are so powerful. I could come up with the solution that I thought would work in CAD, upload it to their website, and instantly know how much it cost and how it was going to be made. The quoting is all done automatically and they offer a variety of materials.
If you want something to be cheaper, stronger, thicker or thinner, they can give you a price immediately based on nearly infinite specifications without uploading a new part file. Their bending simulation also makes you really understand how parts get physically created. If they say they can’t bend something, it’s crystal clear why.
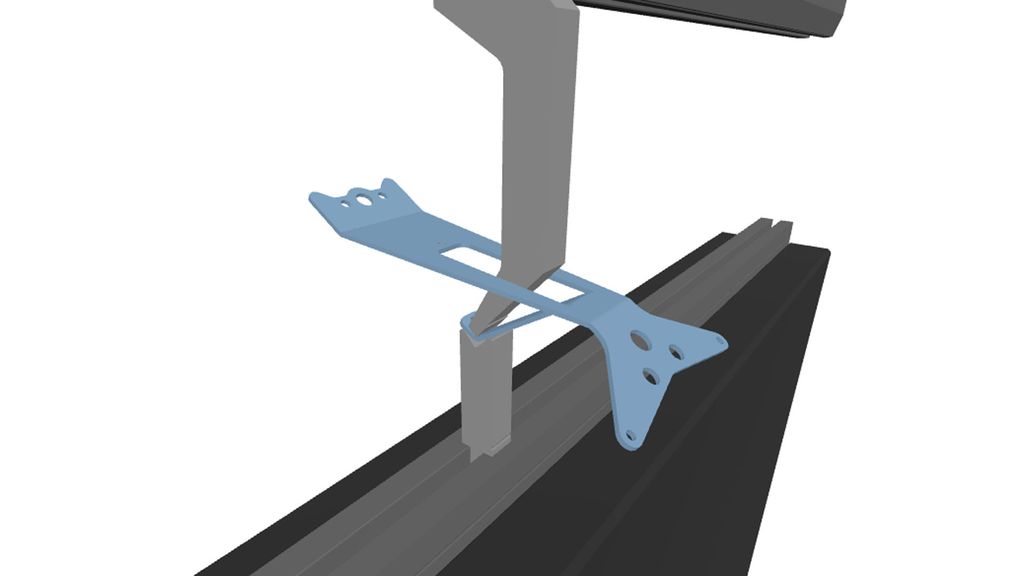
Oshcut’s bending simulator shows you exactly how your part is going to be made with a helpful animation.
After a lot of tinkering in CAD and on Oshcut’s website, I was led back to the fact that what I came up with in the first place was actually a pretty good solution if it had worked. But it didn’t, and all the other solutions were again getting into the territory of real car suspension. I tried some tubes in combination with sheet metal, tubes in combination with 3D-printed metal, tubes in combination with tubes, basically everything I could think of. None of it was really workable.
So I ditched the design, which I probably should have done in the first place. This project series is not really about suspension, as much as I’m sure you like seeing me monkey around with metal tubes to try and get double wishbone suspension assembled without any welding.
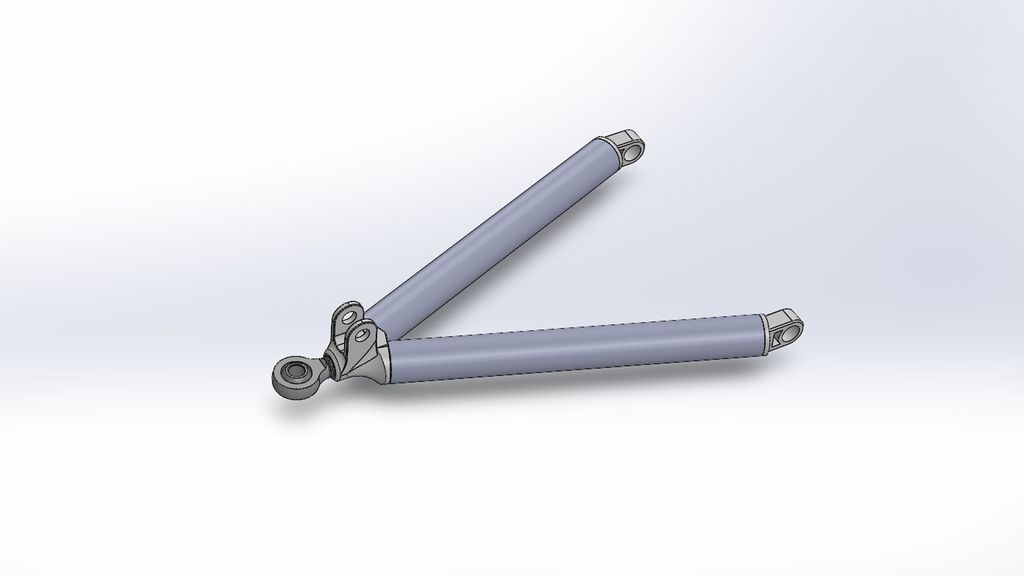
This was a nice control arm using some 3D-printed metal which could’ve been bonded together. I wasn’t sure if the bonding would work and it was expensive, though. The only bonded suspension components I could find were used on snowmobiles.
What I want to illustrate with these stories is that electric vehicles are a lot of fun, and you shouldn’t define what you think of them based on something your uncle said on Facebook. The realities of EVs are far more interesting. You have to get your hands dirty and experience them to get into that mindset, though.
I know we haven’t talked about electricity at all in this story, but soon I’ll talk about the motors, inverter/controller, and battery powering this thing. Until next time.
Photo credit: Peter Holderith For Motor1
Read the full article here


